
One of my very first patterns was called 6 so simple baby blankets – it has six different blankets you can make from soft cuddle fabrics – One of them was called perfect piping. It has become one of my favorite techniques to make a quick blanket. The one featureed in my photo below is the one I make for my nephew Matthew (who is a pilot) every time a new niece or nephew arrive – I just change the backing and the piping for new versions.![]()
We taught the technique as a class at a Pinners Conference last year and they didn’t have time to finish in the 45 minute class … and asked if we could create a tutorial … better late than never right? We are about to teach more classes at the pinners conference in SLC UT and in Tempe AZ. … a BIG THANKS to Kira and Kayla for your help with the video – here’s the link:
Blanket with Cuddle Piping Tutorial
Creating your own piping with cuddle fabrics is really easy – Here’s the ‘quick directions’.
Cut a two inch strip across the width of the fabric (typically between 54 to 60″ wide) – that’s the stretchy way by the way so be careful when you are sewing. Then cut as many strips as you need to go around the outer perimeter of the blanket – For the baby blanket in the pattern it is 30″ square – so you need 120 inches or two strips of cuddle fabric that are 60″ long. With right sides together sew the short ends of the strips with a 1/2″ seam. You should now have a 2″ strip that is 120″ long. I use chunky yarn as the ‘cording’ inside the piping strip – I just look for the chunkiest yarn I can find – often in the discount bin – because the color doesn’t matter as you will never see it. Lay the strip on a table with the fuzzy side down – then lay the yarn right down the center of the strip – and fold the two outer edges today – just like wrapping a bun around a hot dog. Pin the edges together – or better yet – use clover clips and you won’t get poked. Using a zipper foot – stitch right next to the yarn all the way down the length of the strip Then match the outer of the piping strip you just created with the outer edge of the blanket pieces and stitch the layers together using the same stitching line and crossing the ends over each other when they come together. With right sides together – place the other blanket piece directly on top of the blanket with the piping and once again stitch on the very same line all the way around the blanket – Leave a hole large enough to turn it inside out – and go ahead and turn it inside out and stich up the opening … Waa Laaa … you have a fun blanket. Once again .. since I am sure that was clear as mud … check out the video …
We just cut new kits for the Pinners Conferences in SLC, UT and in Scottsdale, AZ so I thought I should add them to our website – they are just $25 each and it includes two coordinating 30″ x 30″ cuddle fabrics and the strips for the piping – as well as the full color pattern with the directions for all six blankets.
![]()
Check out the kits on our website
If you just want the pattern – the downloadable version is available
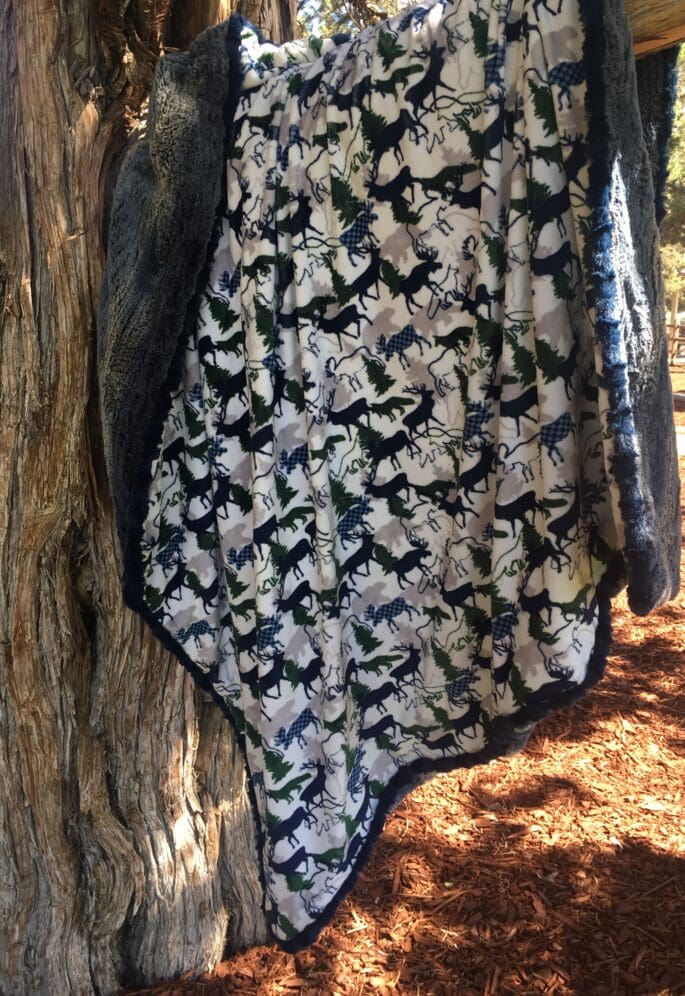
At one of the shows one of our customers asked why I only had cuddle blankets for kids – why not adults? So we started offering kits for adults – I just made one with a piping edge to keep in my hubby’s new truck – For the large blankets we used two yards of two coordinating fabrics – and you need five 2″ strips to go around the outside edge – but super easy to make and so warm and snuggly. It stays in our truck so I can use it whenever I get cold or want to take a nap.


0 Comments