Have you ever used Shannon Cuddle (Minky) fabric as a quilt backing? It is now my favorite way to ‘back a quilt’. When you pick up almost any of the quilts that I have made over the years, almost all of them use super soft Shannon Cuddle Fabrics.
So, the question I am asked most often is: “How exactly do you put cuddle fabric on the back of a quilt?” I have three different methods that I use – and it just depends on the quilt and the look that I want:
- Wrap the back to the front and zig zag it down.
- Self-binding backing
- Cotton Binding
I’ll walk you through each of the methods.
1. Wrap the back to the front and zig zag it down.
This is by far the easiest method. Lay the top of the quilt out on a flat surface and measure the height and the width of the quilt. Then you need to cut the quilt backing 2” wider and 2” taller than the quilt top. I love it when my quilt just happens to be 58” wide x 70” tall. That means my backing needs to be 60” wide x 72” tall, which works really well with cuddle fabrics.
Next step is to lay the backing on a flat surface with the WRONG side up. Then place the quilt top on top of the backing and make sure the 1” of the backing is extending beyond the edge of the top around all four sides.
Wrap the backing around to the front and clip it down. I love using Clover Clips – they come in all different sizes and shapes and they hold the fabric in place until you sew it down – all without getting poked by a pin. I just purchased a bunch of new clips to use in the classes I teach – click here to check them out.
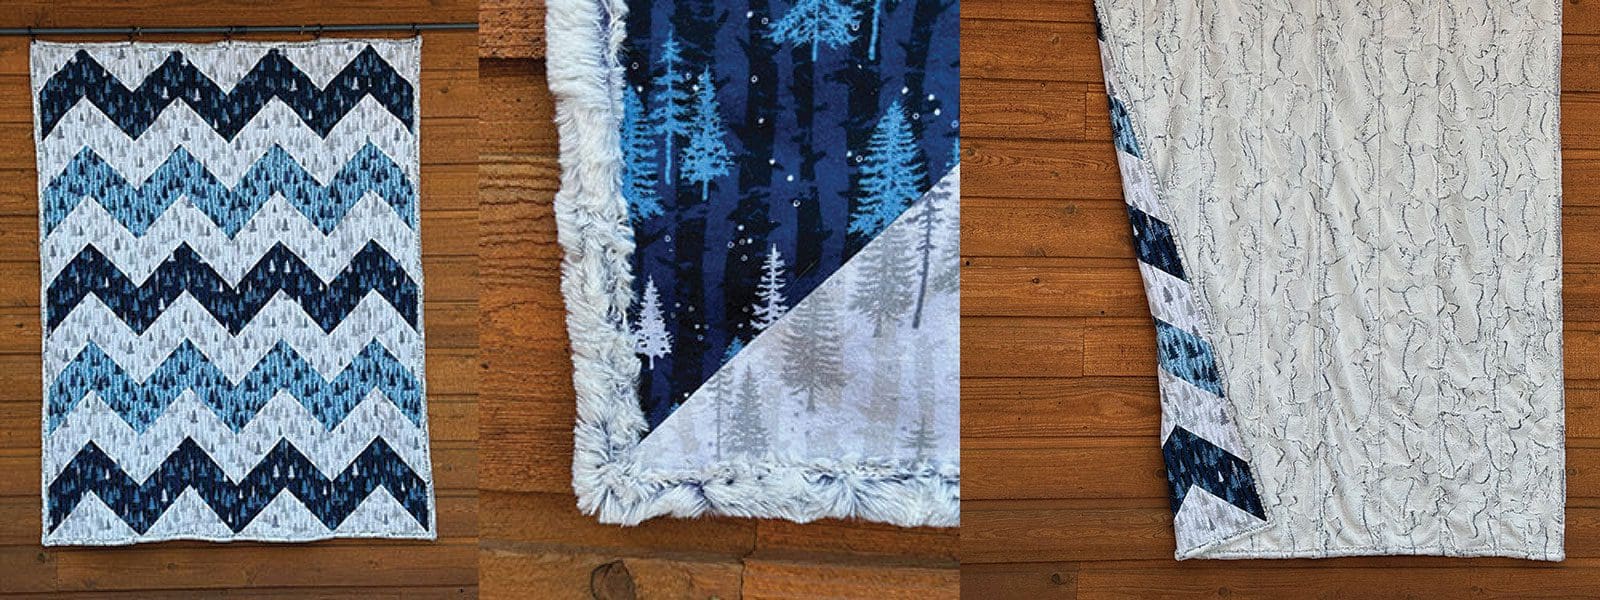
Continue wrapping the back to the front on all four sides. When you get to a corner – it just needs to be ‘mitered’. When you fold one of the sides over to the front, it automatically makes a triangle at the top edge, just fold that triangle back down and clip it in place. Keep going to the next corner, and repeat with another miter. Here’s an example of a mitered corner with cotton fabric, but the process is the same for the cuddle backing.
Once you have clips holding the back to the front all the way around – pick one of your favorite ‘zig-zag’ stitches, blanket stitch, or even one of those cool decorative stitches on your machine that you rarely use – and stitch along the raw edge of the backing. To really secure it on each corner – I stop and stitch right out to the corner on top of my mitered edge and then stitch back to the raw edge of the backing.
I often get asked, ‘don’t you need to roll the raw edge of the cuddle under?’ and the answer is No … Another great characteristic of cuddle fabric is that it will never fray. It makes a mess when you are cutting it, but once you cut it, it will never fray – so no need to roll it under.
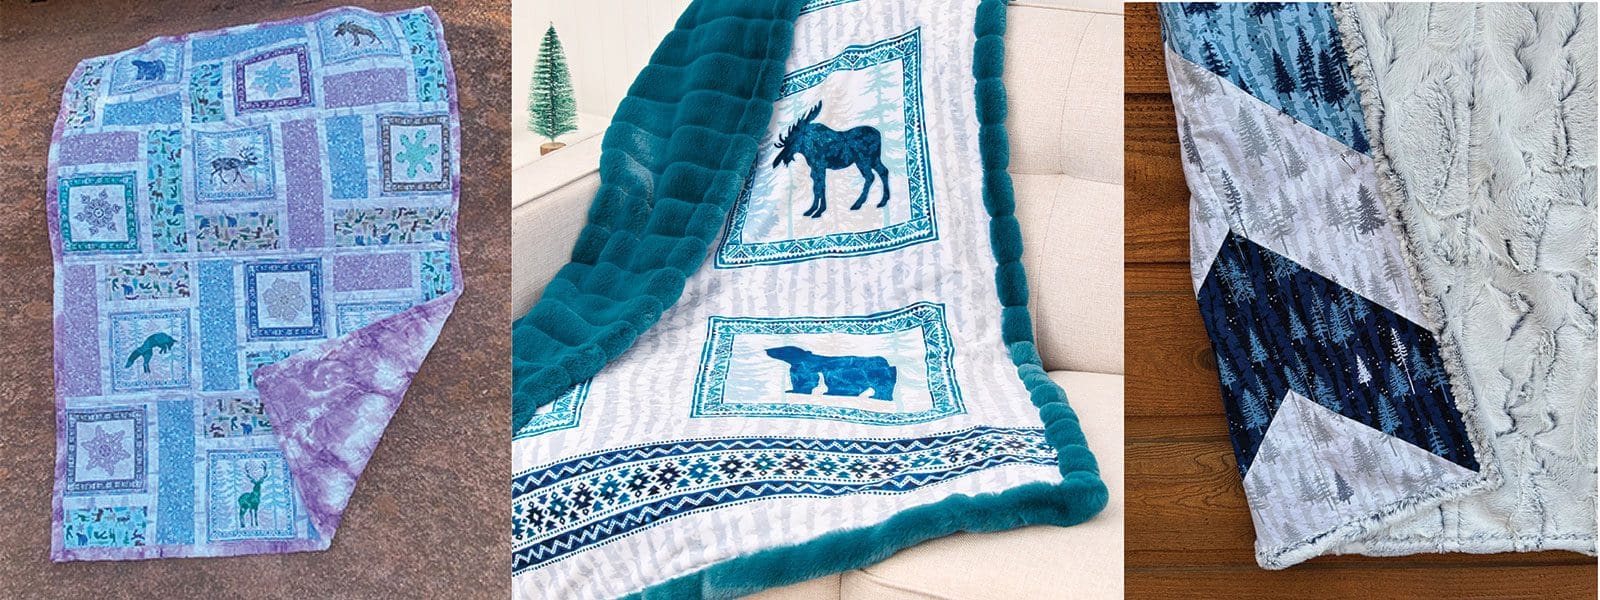
By the way – I have the quilt kits up for sale on my website – if you click on the picture it will take you to the kit for that picture – or click here and you can see all of them!
2. Self-Binding Backing
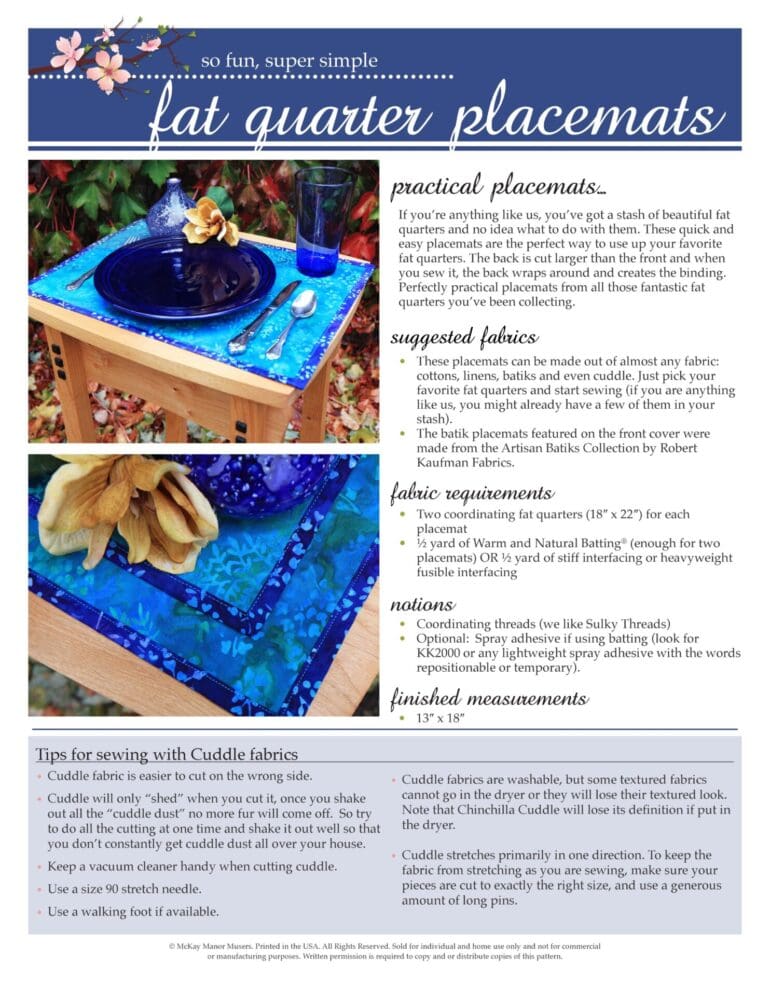
This is the method that I use when I want to use Shannon Cuddle 3 on the back of the quilt – they have some really cute prints that can coordinate with your quilt. For this one, you also cut the backing exactly two inches taller and two inches wider than the top, but this time, you sew them right sides together. When you get to a corner, you have ‘extra’ fabric in the corner and you miter it from the inside. We have a couple different patterns that show you this technique. One is called the Fat Quarter placemat – You can use this binding method on all kinds of different projects. This one shows you how to put a backing on placemats. It’s exactly the same for blankets.
The other patterns that use the same method, are called the So Simple Blanket, and the Sew Simple Pillow. This time the back is cut 10” taller and 10” wider than the top, so instead of just having ½” of the back wrap to the front, you have 5” of the back wrap to the front around each of the sides.
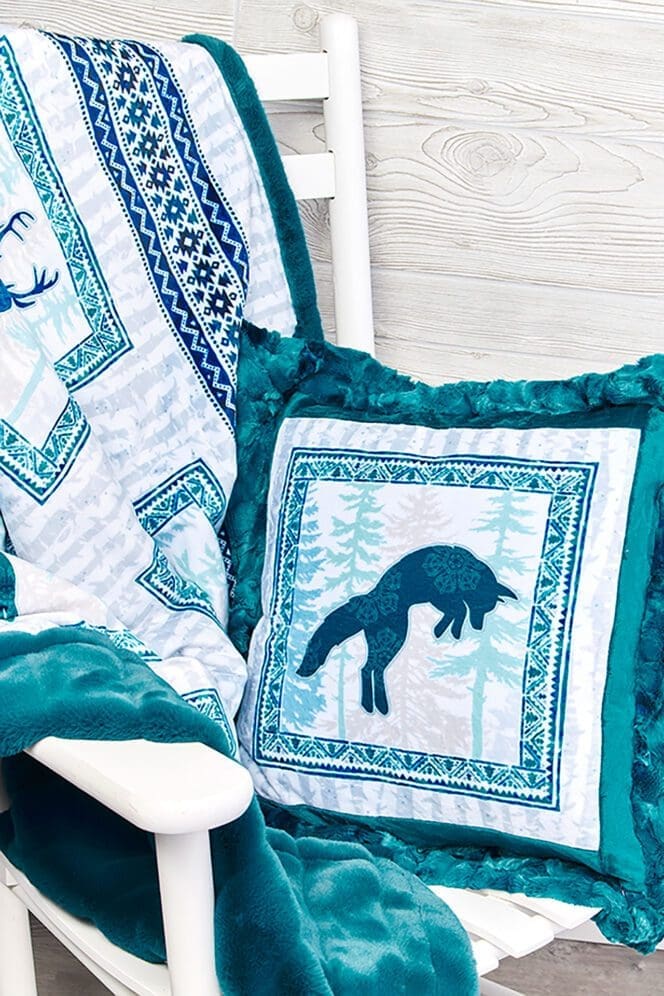
The blanket in the picture below used the placemat pattern to do the ‘narrow’ self-binding backing, and then I used the pillow pattern to make the pillow. The Cuddle Fabric is from our Scandinavian Winter Fabric Line. It is for sale on our website now.
The three patterns are for sale on my website, but if you reach out to me via the contact us form or via email sheila@mckaymanormusers.com and let me know you read this on my blog – I will send you the pattern of your choice for free. Just Do it!
3. Traditional Cotton Binding
This is the most traditional way to add cuddle fabric to the back of your quilt. Cut the backing to be exactly the same size as the top. Measure around the perimeter of the blanket. For those of you that need an algebra refresher – that’s measure the top and multiply by two, and then measure the side and multiply by two, and then add the two numbers together. For instance, if my quilt is 58” x 70” then the perimeter is (58″ x 2) + (70″ x 2) = 256″ perimeter.
Next you need to cut the cotton binding. I typically cut my binding strips two inches wide (by width of fabric). Take the number you calculated for the perimeter and add about 10 (to allow for overlap and for seam allowances … and just in case). Then divide that number by the width of your cotton fabric. So that would be (256″ + 10″)/42 = 9.67 strips. This means I would need to round up and cut 10 strips that are 2” tall by 42” wide.
Place the backing on a large flat surface WRONG side up. Then place the quilt top, RIGHT side up, on top of the wrong side of the batting. Cut the pieces to be exactly the same size. Match the raw edges of the quilt top to the quilt backing and clip in place. Sew around the perimeter of the quilt with a scant ¼” seam to hold the two pieces together.
Then attach the cotton binding to the perimeter of the quilt. I have a video on the McKay Manor Musers You Tube Channel to walk you through the steps to do this, just click here to view the video.
Batting or NO Batting?
I used to put batting in all of my quilts, because that was just ‘the thing you do’. But now – I LOVE to use cuddle backings with cotton quilt tops, with NO batting.
You can use all three methods mentioned above with NO batting!
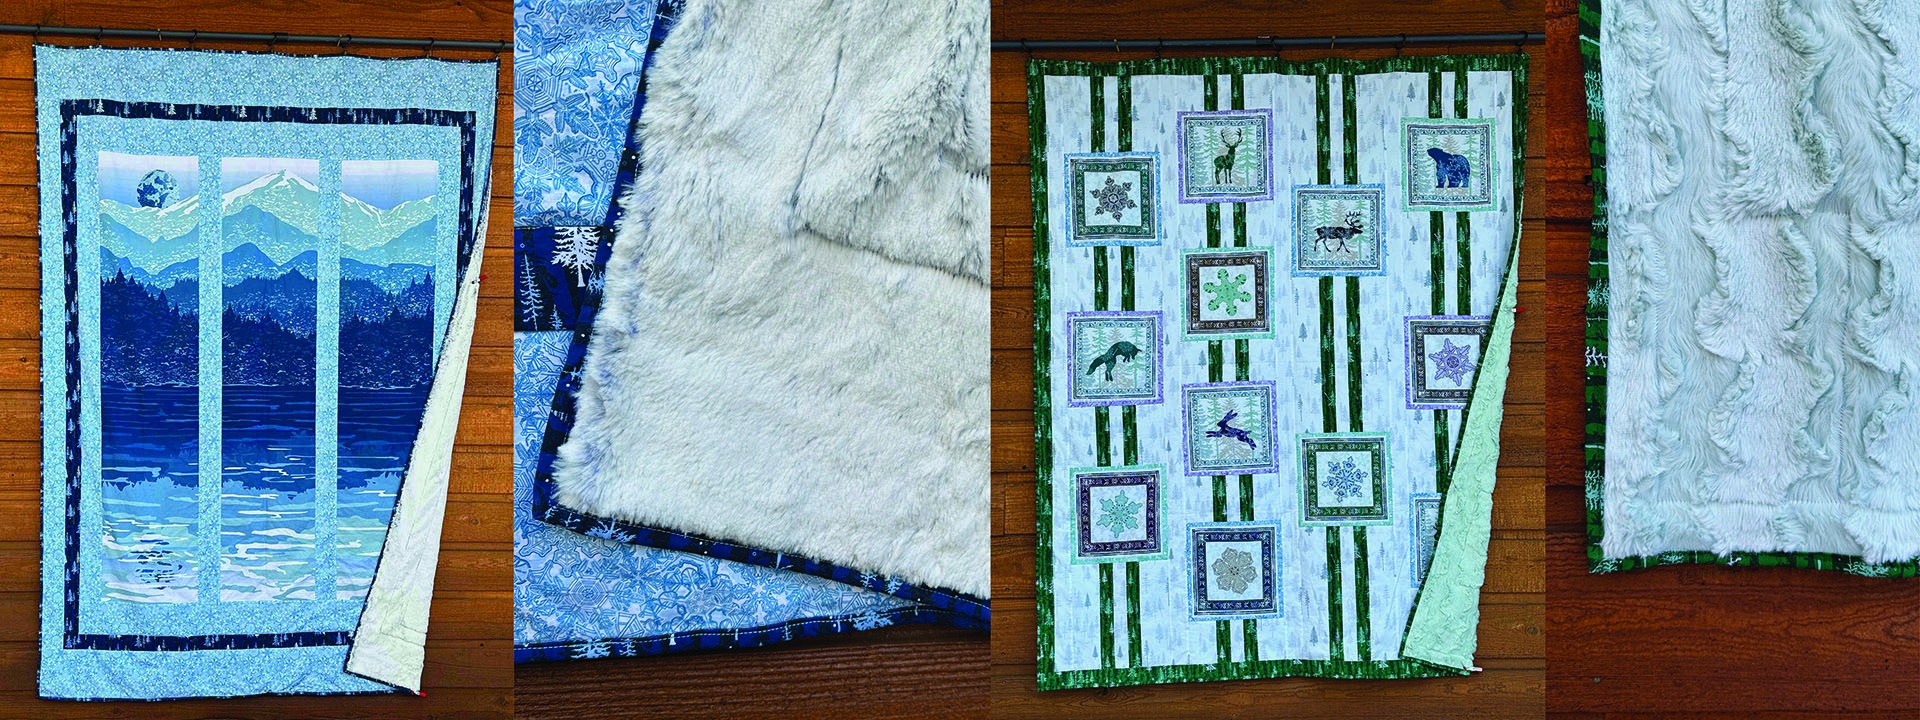
I often do this with method 3 – adding the cotton binding. I put the quilt top on top of the backing and then I ‘hook it’ together with TONS of safety pins, to hold the top exactly where I want it to ‘stay’ on top of the back. I also determine how I want to “quilt’ the blanket. Most often, I will just follow the seam lines in the quilt top. One of the really cool things about using some of the cuddle fabrics on the back – is the design that it creates on the back when you stitch the layers together.
For the first quilt on the left – the flannel chilled chvrons, I just stitched straight lines down the ‘valleys’ of the chevrons. This quilt has Shannon Frosted Hide Luxe Cuddle on the back.
For the second quilt, the Scandinavian Lattice, I stitched all around the purple fabrics. The back on this quilt is Shannon Frosted Zebra fabric. I think this was a one time special color – which I LOVED – but they still offer it in Grey and Camel – and I use them all the time too. In addition to the purple snowflakes, this kit is also available using the denim blue snowflakes and the teal snowflakes.
For the third quilt – Arctic Comforter, I just quilted around the larger blocks and not in the large panels. I used the Shannon Luxe Cuddle Frost fabric for the back of this quilt.
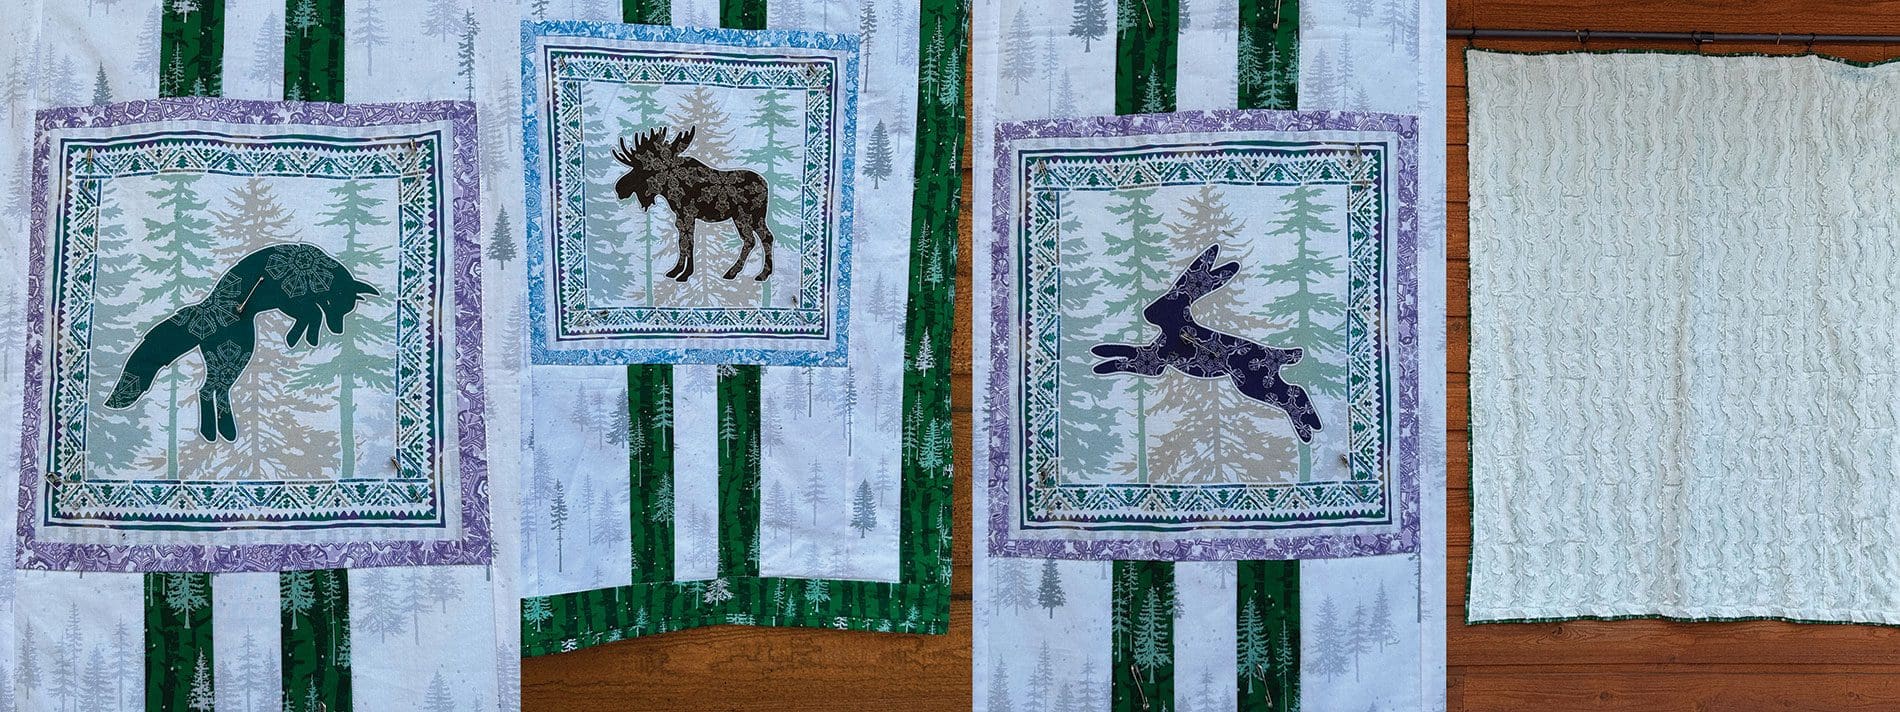
For the fourth quilt, – Nordic Ribbons, I quilted down each of the ribbons, and then around each of the squares. I also used an iridescent silver thread to quilt around each of the animals and the snowflakes, and around the borders of each of the panels. I used Luxe Cuddle Glacier Ice Shanon Fabric for the back of this quilt.
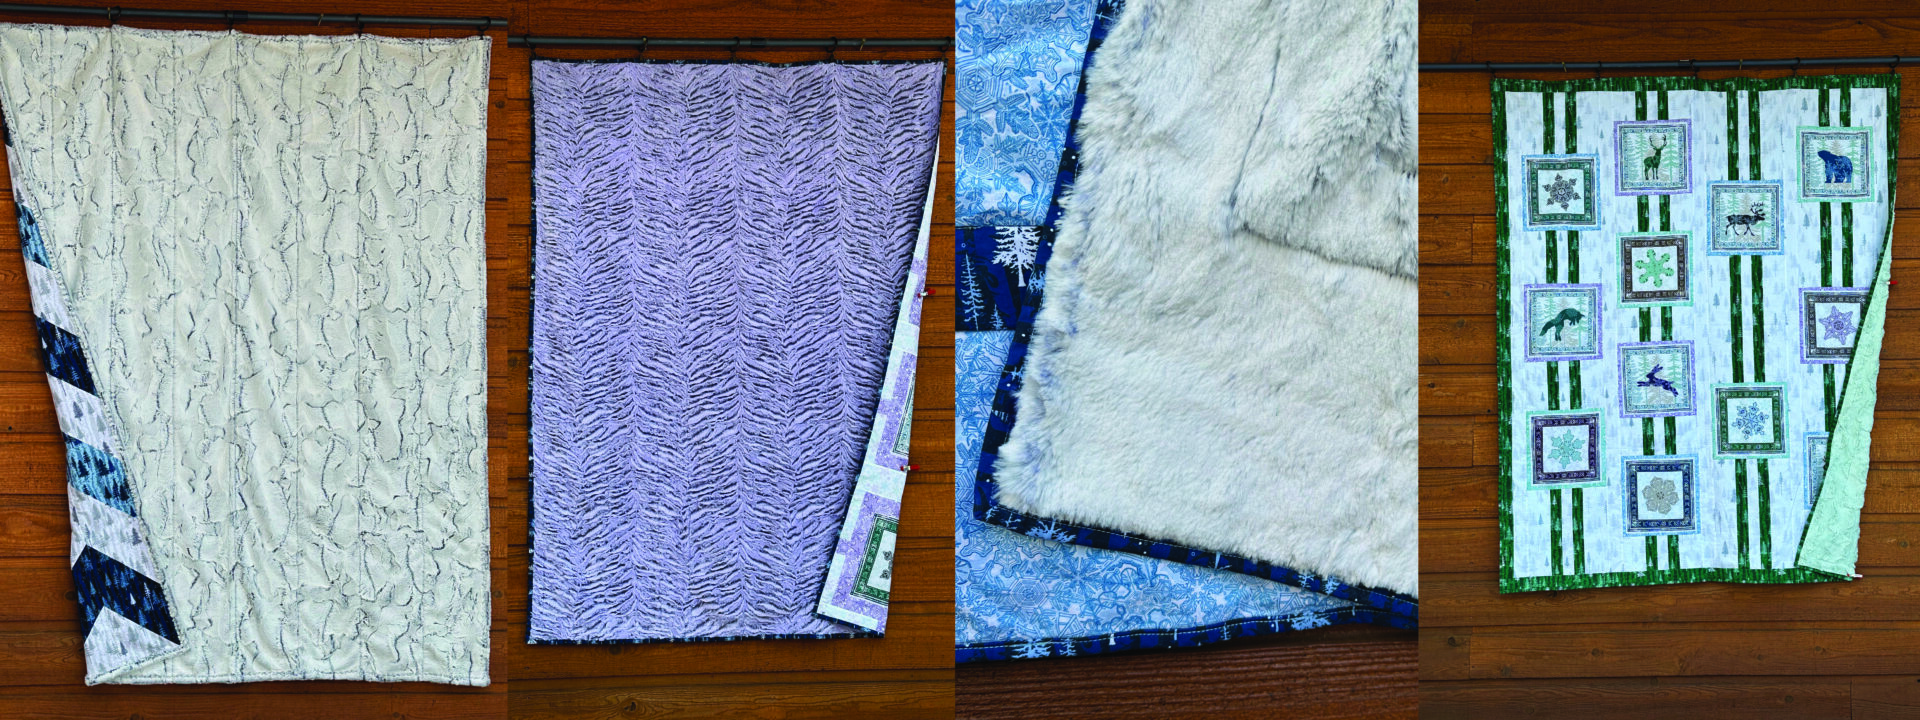
Here’s a close up of the blocks on the Nordic Ribbons Quilt and the blocks on the Lattice Quilt. Just pick which parts of the quilt you want to sew around. For the Nordic Ribbons quilt I quilted down each of the green stripes, and around each of the blocks – you may be able to zoom into the back to see the design. The Nordic Ribbons Quilt is available using the Evergreen ribbons, or it can be made with the Nordic Blue ribbons – Just ask!
Which Shannon Cuddle Fabric should YOU use?
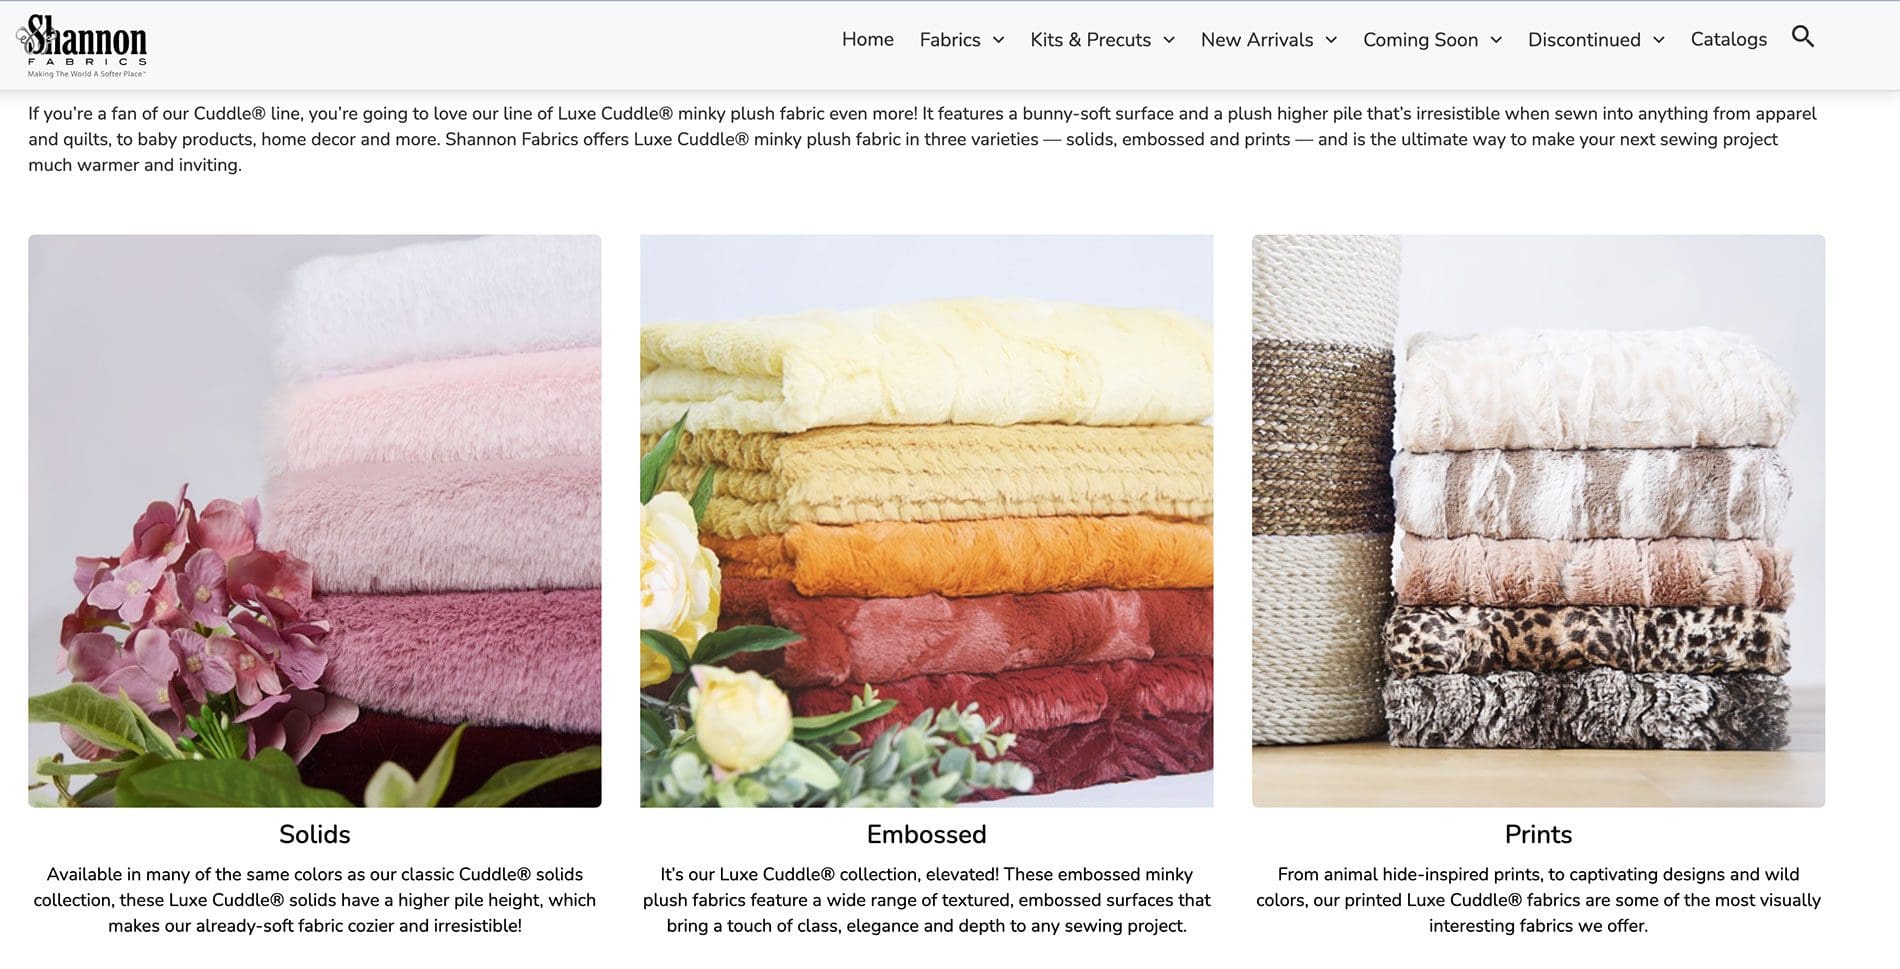
We have partnered with Shannon Fabrics for over 12 years – and we just LOVE their fabrics – such high quality and so many colors and styles to choose from. My favorite type is their Luxe Cuddle. It comes in Solids, Embossed and Prints.
I would suggest that you visit their website www.shannonfabrics.com to see the incredible variety. You could not go wrong with any of them. Some of my favorites are: Luxe Cuddle Hide, Luxe Cuddle Mirage (it comes in 80″ wide so you can use on larger quilts), Luxe Cuddle Sydney and Vienna. And, it sounds a bit weird … but the Luxe Cuddle Frosted Zebra fabrics are amazing – not sure how they got that name – but I have tried lots of different colors and love all of them – the texture is fabulous. I just tried their Luxe Cuddle Galaxy on a couple of the new quilts and I love the different marbled colors. If you need help finding the fabrics, they have a store locator on their website as well.
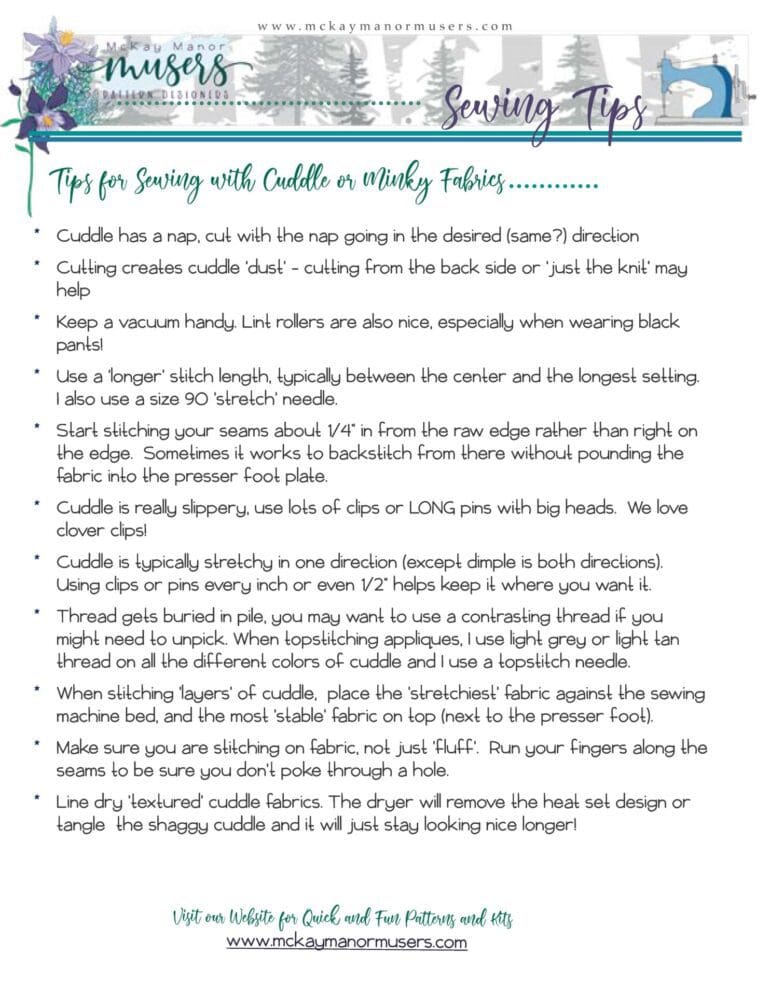
Tips for Sewing with Cuddle Fabrics
Some people are apprehensive to sew with cuddle fabric, because it is ‘hard’ and it can be very ‘slippery’. We have worked with cuddle fabrics now for over 13 years, and we have learned some tips and tricks that might make it easier for you.
My most important tip is to measure the pieces before you put them together to make sure they are exactly the size you want them to be. Then, use a LOT of clips or long pins with BIG heads to hold the pieces together. I sugggest a pin or clip at least every two inches – and possibly closer.
If you are combining two fabrics – like a cotton and a cuddle – Place the most stable one next to the presser foot (the cotton in this case, and them most ‘slippery’ one next to the sewing machine bed. Still use lots of pins or clips, but this helps move the fabrics through the sewing machine easier.
We put together a list of our tips and tricks for sewing with Cuddle fabrics. You can download it by clicking here, or you can go to our website under the Resources Tab to download it.
As always, if you have any questions, please use the contact us form to reach out to me!
PLUS – if you have other tips for sewing with cuddle fabrics that I did not include, please let me know!
Have fun sewing!

0 Comments