Light the World
Each year in December our church – the Church of Jesus Christ of Latter Day Saints – offers a program they call Light the World. This year the theme is Light the World with Love – We can all play a part in the Christmas Story. There is a great video out on the website – showing us just how we can do this – click here to see it.
They put together a Light the World Calendar to give us ideas of things we can do each day in December to spread love. Today’s activity is called Full Attention and it says “Jesus loved people enough to give them His complete attention. Today, commit to putting your phone down whenever someone’s talking to you.” This is a good one for me – and it’s not necessarily my phone – It seems like my To Do List goes on and on forever – so I tend to multi-task. Today I will commit to giving my full attention by not multi-tasking at the same time. Click here for a copy of the service calendar.
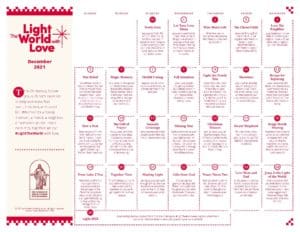
This year they put together a Service calendar for kids – with a really cool picture of the manger scene that they can color on the back. Click here for the kids calendar.

Christmas just seems like a great time to reach out with service to those around us. I was looking for a service project to do with the sisters in our ward. I decided we could make those tied fleece blankets for the Memory Care Unit in our small town. I figured they were pretty easy to make and would go together quickly. They were also fairly inexpensive as I hit the Black Friday sale at JoAnns. There are all kinds of fleece out on the market – Choose one that feels really soft on both sides – is fairly ‘thick’ – i.e. you can see through it when you hold it up to the light – and one that doesn’t ‘pill’.
Here’s how we made them.
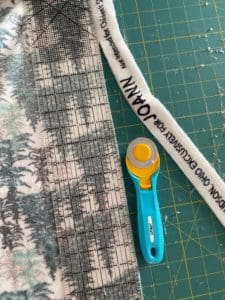
Step 1 – Buy two yards of your favorite fleece.
Step 2 – Cut off the selvages on both sides. The selvage is the small strip of fabric that runs on the outside edge of the bolt. It typically has writing on it – like the name of the print and the manufacturer.
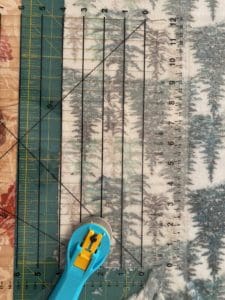
Step 3 – Cut 4” square out from each corner of the blanket.

Step 4 – Cut the fringe. You need to cut strips that are one inch wide and 4 inches deep all the way around the outside edge of the blanket. Many moons ago I purchased this really cool tool that helps me do that. It is called the Shape Cut JT-796 from June Tailor. It looks like they still sell them directly from June Tailor and also at JoAnns and at Amazon. This made it really easy to cut the strips exactly 4” deep and 1” wide. June Tailor also has videos on how to use the tool. They also have all kinds of new rulers that I did not know even existed.
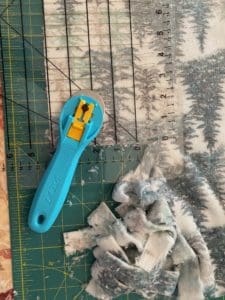
Step 5 – Tie a single knot in each piece of fringe. Just wrap it around your finger and pull it through. Push the knot as close as possible to the beginning of the fringe.

Step 6 – Continue tying knots in the fringe until you have tied knots in each piece of fringe.

Step 7 – Step back and admire your work.
![]()
Step 8 – Wrap yourself up in it to make sure it is comfy!
Alzheimer’s victims hold a very special place in my heart. My mother suffered through it for almost ten years. I hope the special ladies and gentlemen in the Forest Ridge memory care unit feel a little more love when they wrap themselves in the blanket. Here’s a picture of the blankets we are donating this week for the Resident party.
![]()
I put together a 4×6 photo with the challenge to Light the World – you can download it for free from our website by clicking here or on the picture.

Go out and light the world with love!
Sheila


0 Comments